The number one problem of self hosting your own email server is deliverability. If you rent your server from the cloud, you’ve likely shared IP addresses with spammers, leading to Microsoft or Google blackholing your IP address with no recourse.
There is a simple solution to this. It’s to configure outbound SMTP relay to use Amazon SES. Amazon SES is a trusted IP address and your emails are guaranteed to at least be delivered (may still end up in spam….) instead of blocked.
This is a guide on how to setup our service to use Amazon SES.
Step 1: Create SMTP credentials
NOTE: If you’ve already created SMTP credentials, then you can skip this step. This only needs to be done once for all your domains in Amazon SES. Because you can reuse the SMTP credentials for all domains.
In this screenshot, note the “SMTP endpoint”. You will need this later.
In this screenshot, click the orange button in the top right: “Create SMTP credentials”. Go through the wizard. At the end, you get a SMTP username and password. You will need these two later.
https://us-east-1.console.aws.amazon.com/ses/home?region=us-east-1#/smtp

Step 2: Verify your domain
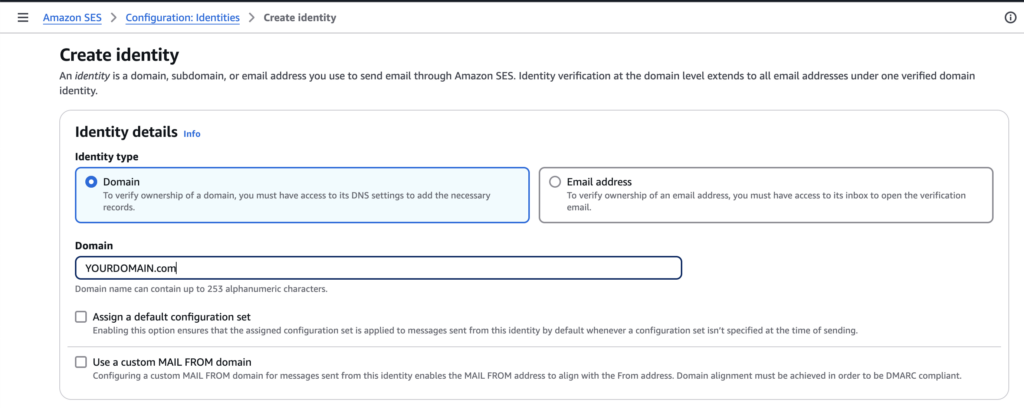
Click orange button “Create Identity”.

Input your domain:
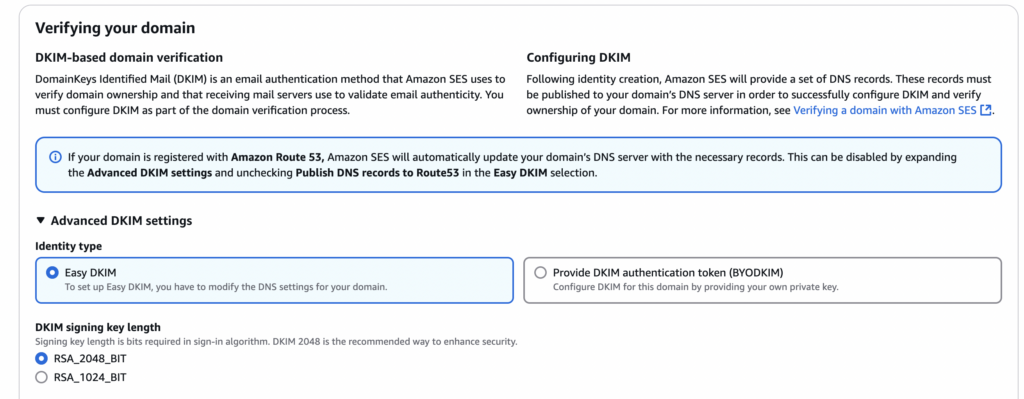
Choose “Easy DKIM” and “RSA_2048_BIT” to verify the domain.
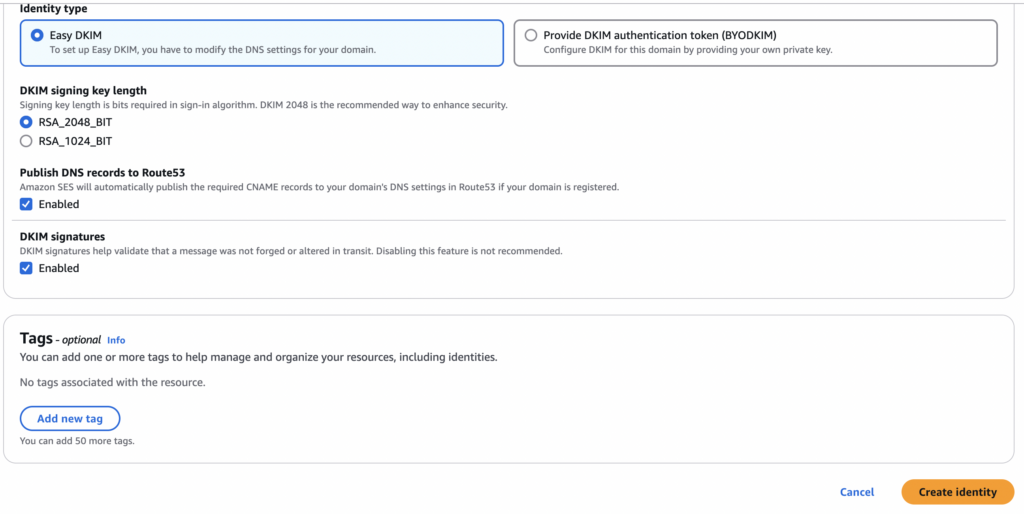
Click orange button in the bottom right “Create Identity”
On the next screen, AWS will list the three CNAME records that you need to publish. Once you’ve updated the DNS records, refresh this web page a few times and AWS will show it as verified. AWS is pretty quick about verification. It took me only a couple minutes to see the status updated.
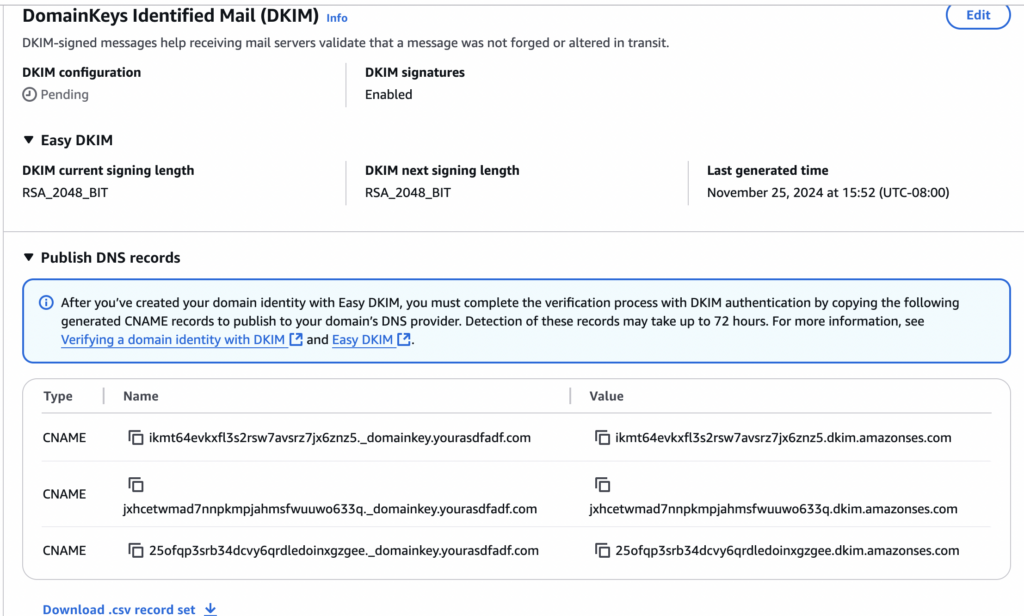
And then that’s it. You’re done. The domain is verified.
Step 3: apply for production access to Amazon SES
Amazon SES doesn’t allow just anyone to use Amazon SES for sending emails.
Apply to Amazon SES and explain to them how you’re not a spammer.
NOTE: you only need to apply once for all your domains.
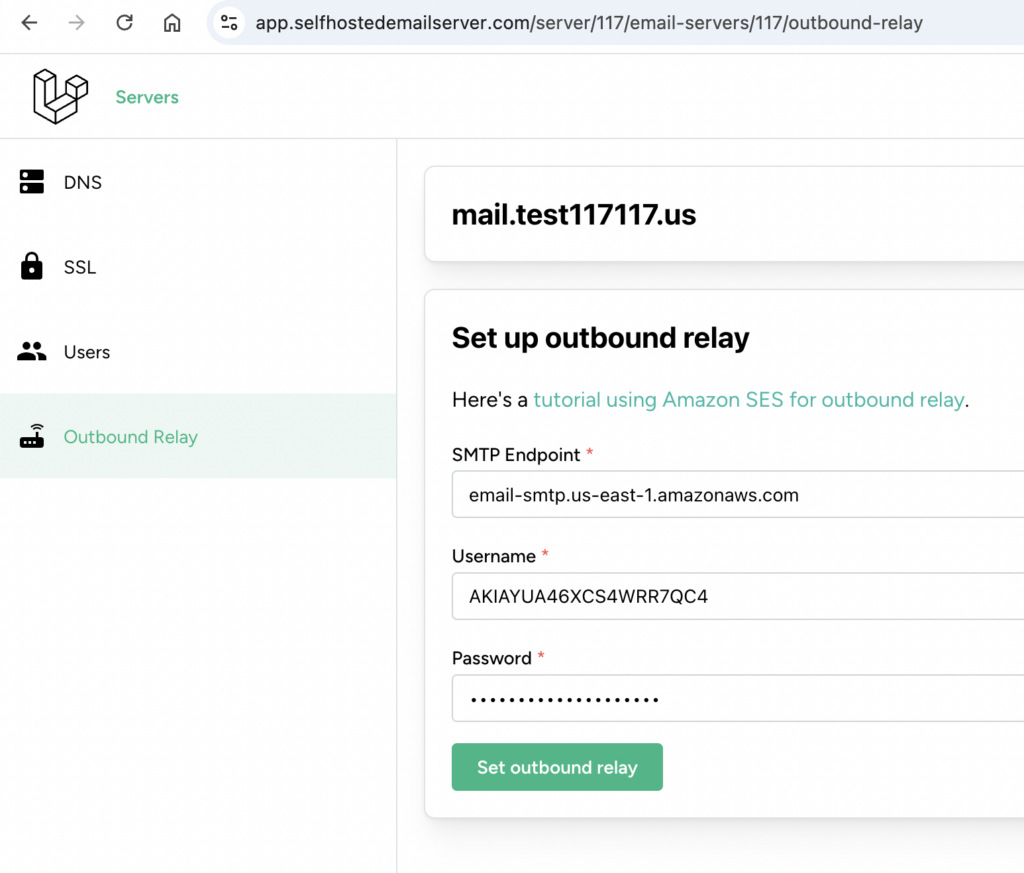
Step 4: input the SMTP credentials
The final step is to configure it in our service. This is pretty straightforward. You will need the credentials you got from Step 1.
Step 5: Test the outbound SMTP relay is working.
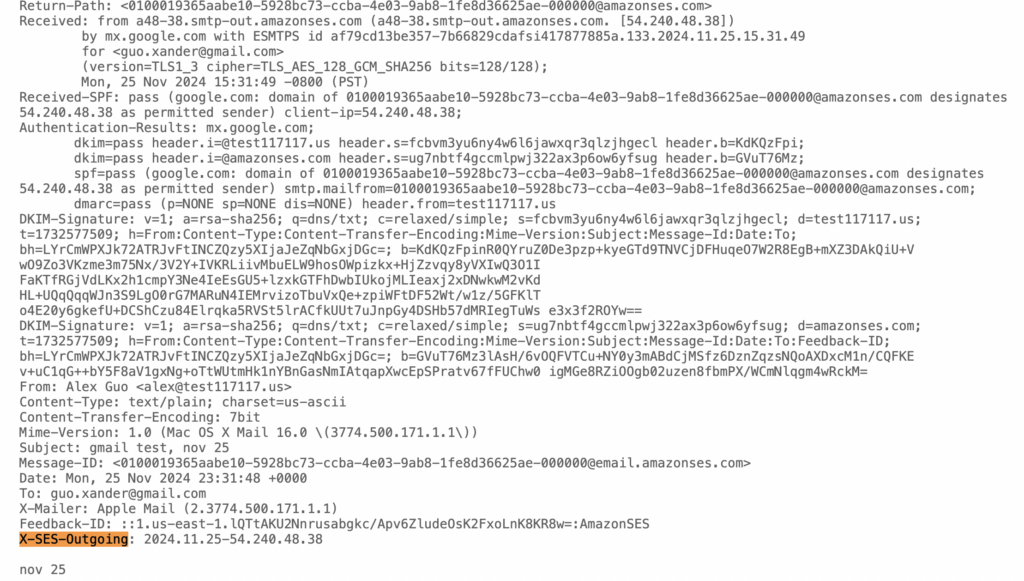
Send a test email to gmail. Then look at the message source. Here’s screenshot for gmail:

That will get you to the message source. You should be able to see Amazon SES headers in the message source. Particularly the “X-SES-Outgoing” header. Screenshot:
Here’s how to see the message source if you are sending test email to outlook:
